
How to dress an obi
Bunko-musubi 2
| Back page | Bunko-musubi top | Next page |
| 1/2/3/4/5 | ||
how to make bunko-musubi (continued)
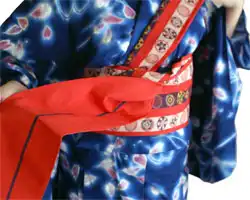
7. Put the Tesaki on the shoulder down and bring it back through the folded obi.
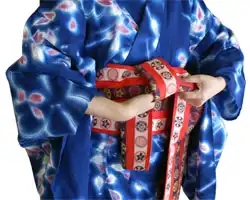
8. Keep holding the Yukata tight with both hands and slide the left hand to the left.
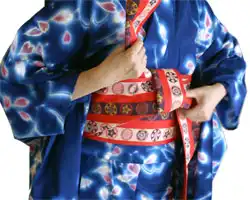
9. Pull both ends tightly to the opposite direction on the angle.
10. Pull once both ends vertically to tie properly.
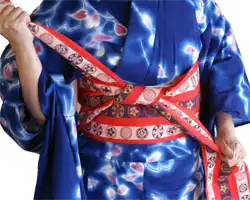
11. Unfold longer side of the obi called a tare on the right side.
Unfold it very next to the knot to prevent the knot from becomeing loose.
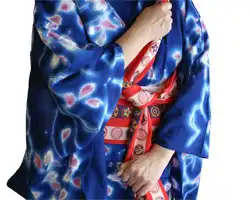
12. Fold it like a folding screen in the width of the body.
It would be pretty to make Maki-datami if you use an obi with different color on each side.

Refer below about Byoubu-datami and Maki-datami
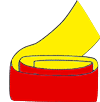
Byoubu-datami and Maki-datami
Byoubu-datami

Maki-datami
When the length of a tare is not enough, it is easy to adjust by tucking it inside of the obi.
With a reversible obi, you do a Maki-datami to make a ribbon of which the bows are the same color.
Also you apply a Maki-datami to make a bowknot with doubled bows.
| Back page | Bunko-musubi top | Next page |
| 1/2/3/4/5 | ||